I have written down this picture tutorial for making paper lanterns, which can be used for special occasions like Diwali,Xmas,New year,formal parties,for brightening up kids rooms or for the lantern festivals celebrated in different parts of the world viz China,Japan,Indonesia,Malaysia,Singapore.
For making these lanterns you'll need-
24 Long bamboo sticks,
8 Short bamboo sticks,
Suitable paper(Please check about the fire safety of the material),
Punching machines,
White glue,
Scissors,
Some pieces of string,
A small piece of buckram.
Fire retardant spray for paper


I also tied some beads at the lower end.The beauty of this lamp is that it can be folded and occupies as little space as this.


For making these lanterns you'll need-
24 Long bamboo sticks,
8 Short bamboo sticks,
Suitable paper(Please check about the fire safety of the material),
Punching machines,
White glue,
Scissors,
Some pieces of string,
A small piece of buckram.
Fire retardant spray for paper

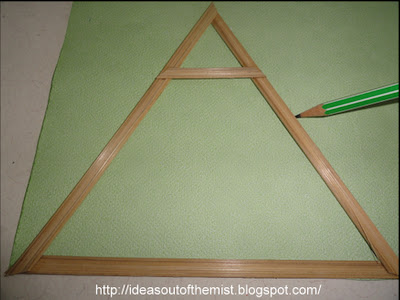
1-First take the bamboo sticks-7.8 inches long and cut them at an angle at both the ends as shown in the image above.You'll need 24 of them for a single lamp.Then for the shorter bamboo sticks you need to cut 2.8 inches long sticks and also cut them at an angle from both the ends.You'll need 8 such small sticks.
2-Then take 3 longer ones and a short one and using White/PVA glue form a shape as shown in the image below.You will need 8 such triangle shapes.

3-Then, place this shape on the reverse side of a paper(treated with fire retardant spray) and trace the outlines(not the complete outlines from the bottom till the smaller bamboo stick).

4- Cut out the paper and paste it on the frame as shown.You have to repeat steps 3 and 4 so that you get 4 such pieces.

5- Cut out another piece of paper by tracing it on another triangular frame and using punching machines cut out shapes in a pattern of your choice.I used the punching machine on the 3 sides.

6-Then paste the final shape on the frame and it will look somewhat like below.Repeat steps 5 and 6 and make four such frames.

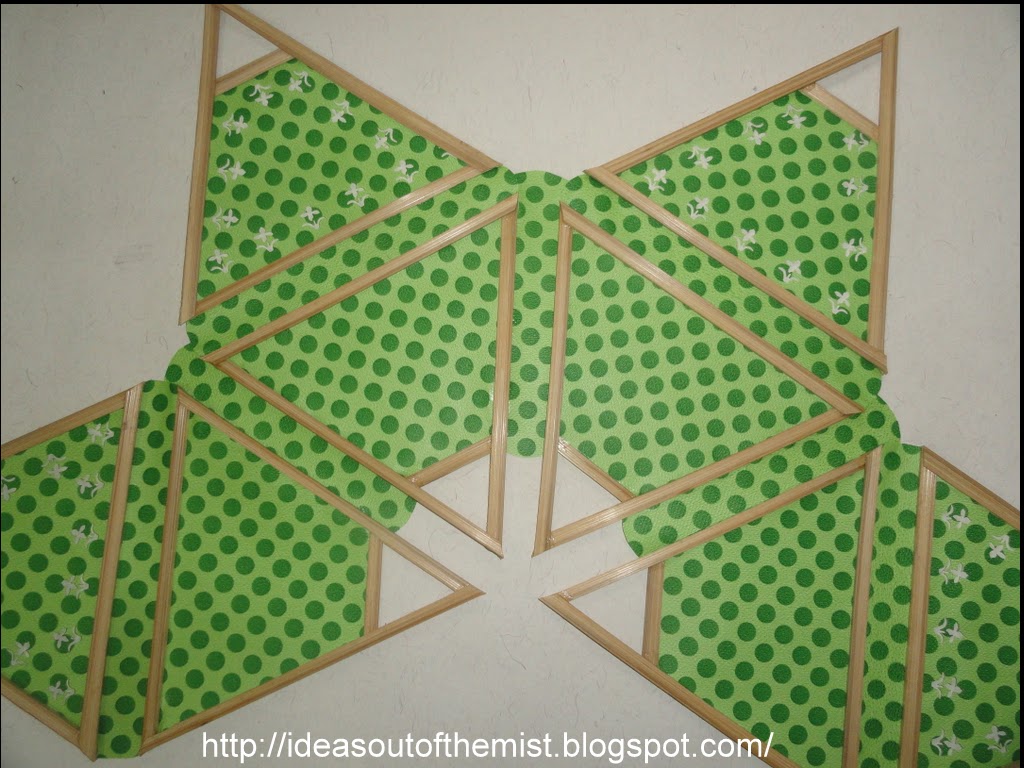
7- By now you have 4 plain frames and four punched ones.So take two frames-a plain one and a punched one, and a thin strip of paper(approx 8.2 inches by 1.5 inches),rounded at the edges.

and paste them together as shown below.

8-Repeat step 7 four times and you'll finally have 4 such frames.

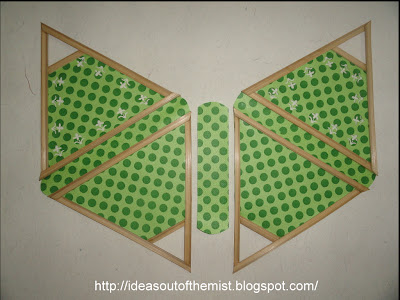
9- Now take two frames from the above step and another strip of paper(6 inches by 1.5 inches approx).

10-Join the two pieces together using the strip of paper.Then take another frame from step 8 and another strip of paper and join them in a similar fashion.Keep repeating this until you have something that looks like this.
11- Now attach the 4th piece to the 1st one and you'll have a shape like this.This is a view from the top.

12- Tie thread at the 4 free ends of the lamp.

13- Now take the piece of buckram,cut it in a flag shape and pass all the threads through it.Now very carefully seal the ends of buckram till more than half way through,taking care not to glue the threads.On drying this flag shape piece can move up and down and help in keeping the shape of the lamp.

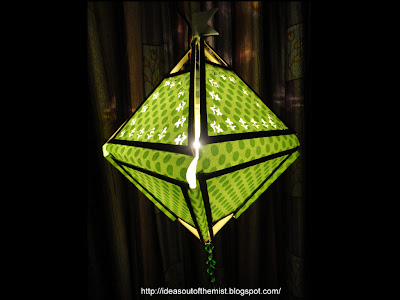
14- The final lamp will look like this.

I also tied some beads at the lower end.The beauty of this lamp is that it can be folded and occupies as little space as this.

WARNING : Please do check about the fire safety of the paper before using it and use a very low wattage light to avoid any mishappening....And use fire retardant spray for paper.Do not use candles or other such burning things inside the lamp.These lamps are for outdoor use only.
Hope that you liked the tutorial .Will also post a video tutorial for this soon and that might help if you feel that the instructions aren't clear with the images.
Don't forget to follow us on Facebook,Pinterest,Google+ to stay connected and get latest updates.......:)
P.S. You can find another super easy version of our lamp tutorial from HERE.
A third version can be seen HERE.
So,until next time.
Bye and take care,
Mihika.